by David Hinks
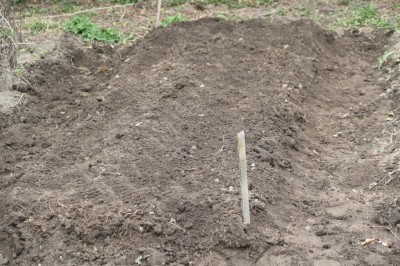
On a sunny day last week I prepared a raised bed for planting some early greens. My goal was to create a raised bed about a metre wide and three or so meters in length. The first step was to dig over the area and get rid of any weeds. Then I dug out the pathways between the beds down about three or four inches, tossing that soil onto the beds on either side of the path. I then added some compost – some of my own and a bag of composted sheep manure. I then mixed it up a bit with a spading fork and was ready to plant. I used the back side of a steel rake (I could have used a hoe instead) to dig three parallel rows about a cm deep. I then planted three rows – one row of a mesclun mix of a variety of greens, a row of carrots and a row of spinach – then drew the soil back over the seeds and tamped it down lightly with the bottom of the rake.
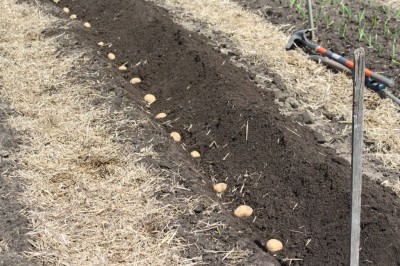
A couple of other raised beds were used to plant potatoes. I plant two rows on my metre-wide raised beds. I plant my potatoes rather deep (ten cm or more) for a couple of reasons. Firstly if they come up too soon the tops can freeze – this will not kill them but it does slow them down. Secondly and more importantly is that the new potatoes will grow on the plane above the seed potato. This tends to push the potatoes into daylight where they will turn green and be mildly poisonous if they are not planted deeply enough. This is the reason that gardeners ‘hill-up’ their potatoes. This is just simply drawing up the soil on both sides of the row of potatoes. I prefer to use a mulch of about ten cm of straw on the potato beds which helps keep them from being exposed to the sun and is easier than a lot of hilling-up with a hoe.
I planted one bed of Yukon Gold and one of Irish Cobbler, both are early varieties. I like to buy my seed potatoes at Tru-Value where they dump the seed potatoes in bins and let you pick out the ones you want. I prefer to find potatoes about the size of an egg if I can.
This way of growing makes potatoes adaptable to other methods of growing. For example some people are trying to plant potatoes in the bottom of a barrel or other container and then keep adding soil as the potato vines grow, always leaving about 20 cm of vine exposed. In theory the container will be full of potatoes at the end of the season.
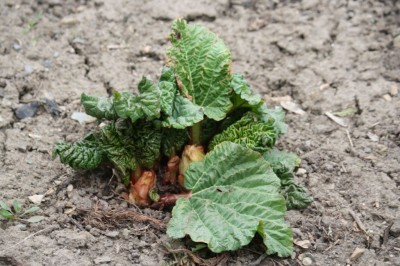
Some plants that we grow in the vegetable garden are very hardy perennials. In particular both rhubarb and asparagus will thrive in the garden for 20 or 30 years or more if the planting bed is well prepared, if the plants are given some time to get established (with asparagus this may take three years), if some compost is worked in around the plants in the spring and if you are able to keep perennial weeds such as grasses and thistles from getting established in their patch. In the photo the rhubarb is up and growing rapidly in the cooler temperatures.
Most herbs can be treated as hardy vegetables – such as oregano, mint, lovage, dill, chives, sage, tarragon and thyme. The exceptions are rosemary which is a perennial but must be brought indoors in winter and sweet basil which is extremely sensitive to cold and is best started indoors from seed in April or grown from seedlings purchased from a garden centre. At the least hint of cold weather in September basil leaves turn black and start to fall off.
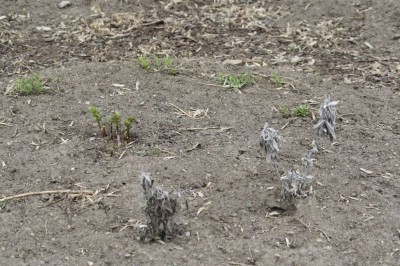
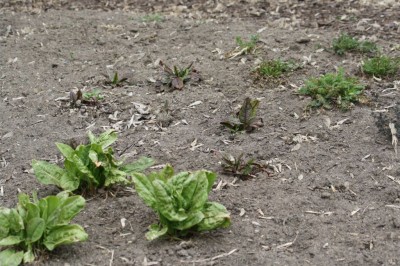
All the hardy herbs are showing signs of life. In the first photo are lovage, tarragon and sage. In the second photo are sorrel, bloody dock and salad burnet (an old-time salad plant) – all off to a great start!
The second workshop sponsored by the Neighbourhood Tomato Education Committee will take place on May 4 from 2 to 4pm at 252 Clayton Road just outside of Almonte. At this FREE workshop you will learn about how to transplant seedlings and other plants. The workshop will include a component of learning what to do and what not to do for transplanting different plants and also an opportunity of actually doing some transplanting. If you have a plant you wish to transplant please bring it with you, along with a pot the next size up. There will also be some transplanting happening in the garden so please dress appropriately for the day.
Details to register are on an eventbrite invitation. Please share far and wide. Here is the link to the invite.
You can also find details on the Neighbourhood Tomato Facebook:
.


